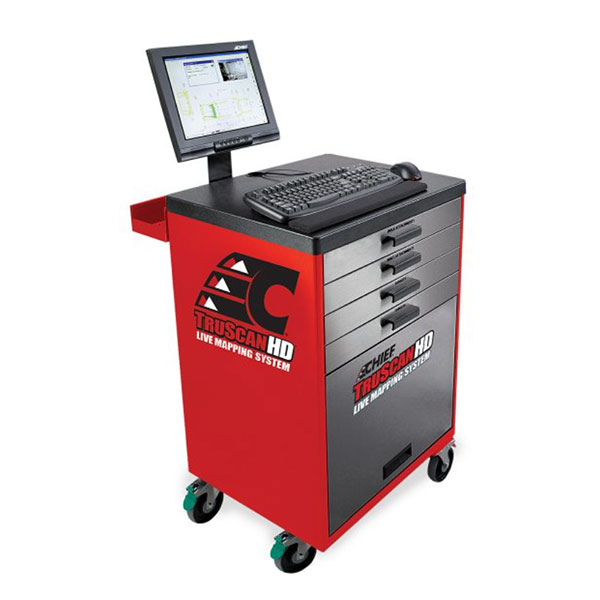
TruScan™ Live Mapping System
TruScan™ Live Mapping System
Real-time, collision measuring system for heavy-duty vehicles High-precision, self-leveling, live-mapping programs
Take advantage of TRUSCANHD™ pinpoint technology to document the damage you can see – but primary and secondary damage you can’t see – helping your techs develop more efficient repair plans, eliminating comebacks and helping you find and get paid for hidden damage.
Live-Mapping™ with Self-Leveling Multi-Point Scanner
The key is our vehicle body scanner which locks in up to 45 pre-defined high-tech targets in real-time. This technology means no vehicle leveling is necessary, so technicians deliver on the money reports each time, every time. Its proprietary software helps in identifying incorrect pull set-ups BEFORE they are made to prevent additional damage and speed the repair process.
Description
Detecting Misalignment in a Vehicle's Structure
Whether detecting misalignment in a vehicle's structure or verifying repairs has eliminated the damage, the TrueScan computerized measuring system can do the job. TrueScan integrates the precision of laser scanning with a computerized database for unmatched accuracy in collision repair and analysis. In addition to showing the extent of collision damage, TrueScan monitors progress throughout the repair and verifies the vehicle's structure is correctly aligned. Three separate reports verify the vehicle's structural condition by showing overhead diagrams that display centerline, datum line, and datum height measurements, offering indisputable evidence that the repairs made were not only needed…but returned the vehicle frame to its pre-collision condition.
TrueScan™ System Measures on the Principle of Triangulation
The system's single hub scanner houses Laser Lights that reflect off of revolving mirrors toward light-reflective Targets (each bearing a unique code) that are suspended from a vehicle's reference points. The Body Scanner houses photo sensors that identify the angle of revolving laser reflections. This information is transferred to the computer which performs the triangulation and Target identification functions.
Specifications
Steel Cabine Workstation:
- Powder-coated baked finish with chemical-resistant ABS molded top.
- All welded frame structure.
- Two (2) rotating and two (2) fixed casters for easy mobility.
- Complete 110 or 220 volt system.
Computer:
- Windows 10 Professional Edition Required.
- Heavy-duty CPU with Extreme Graphics, DVD player and 6-Channel high-output audio system.
- Hyper-threading feature allows multiple programs to run simultaneously without slowing either program.
- Stored safely in cabinet bottom.
Software:
- Chief measuring software can be navigated quickly and easily.
- On-screen photos of attached and where they should be located.
- One-touch movements.
- X-measurements can be made with a click of the mouse.
- Comparative SAI and caster measurements.
- The system can be set-up to calculate for removed components.
- Three separate and easy-to-read color reports to show measurements before, during, and after repairs are made.
- Your company logo can be incorporated into the document design.
- Includes interactive help and tutorial.
Printer:
- HP color printer
Body Scanner with Tray:
- Small 6″W X 6″ X 23″L design helps prevent target blockage
- 2 lasers
- 2 rotating mirrors
Targets:
- 32 individual car-coded reflective targets for large scannable area.
- Recessed faces for maximum protection.
Bolt Attachments/Clips:
- Metal style attachments
- Clip on bolt heads ranging in size from 10mm to 35mm
Hole Attachments/Clips:
- 58 alluminum snap-in attachments ranging in size from 10mm to 32mm.
- Side hole clips ranging in size from 23mm to 35mm
Literature:
- User manual, parts manual, basic training manual, user manual(s) for computer, printer, and
- Microsoft Windows Available on CD
More Information & Resources
Additional Documents: Truscan Measuring System Parts Manual
